
I just made Red Velvet Thumbprint Cookies that are insanely red with a shiny Hershey Kiss in the middle and yes, they look exactly like edible jewelry.
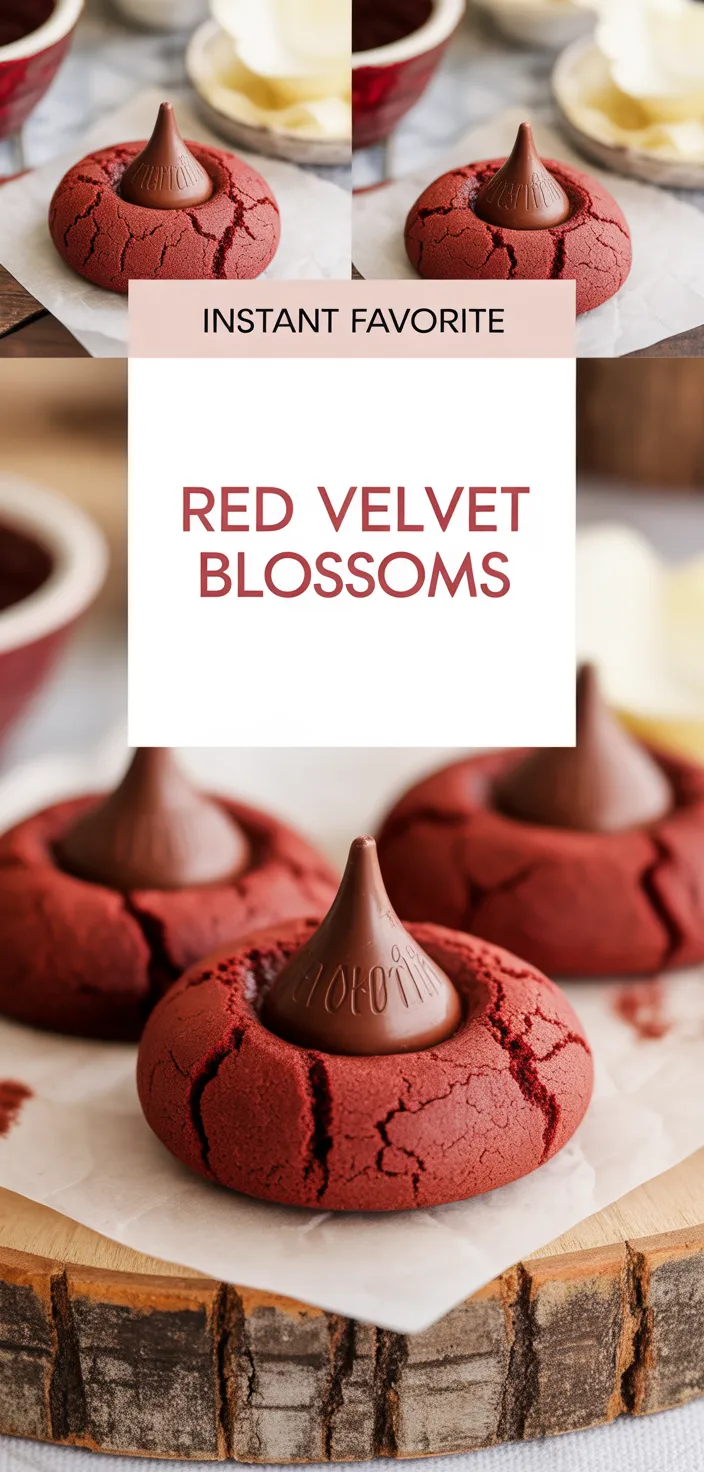
I’m obsessed with these Easy Hershey’s Red Velvet Blossoms because they hit every sweet spot for me. I love the brutal contrast of red cookie and gooey chocolate center, how a Hershey’s Kiss settles into a soft crater and refuses to stay neat.
They’re basically Hershey Kiss Thumbprint Cookies but with that red velvet vibe I can’t quit. Red Velvet Thumbprint Cookies that look festive without trying too hard.
I’ll eat them cold, warm, whatever. And I brag about one ingredient: 36 Hershey’s Kisses, unwrapped.
Pure, childish joy in cookie form. No shame.
I want them all now right away.
Ingredients
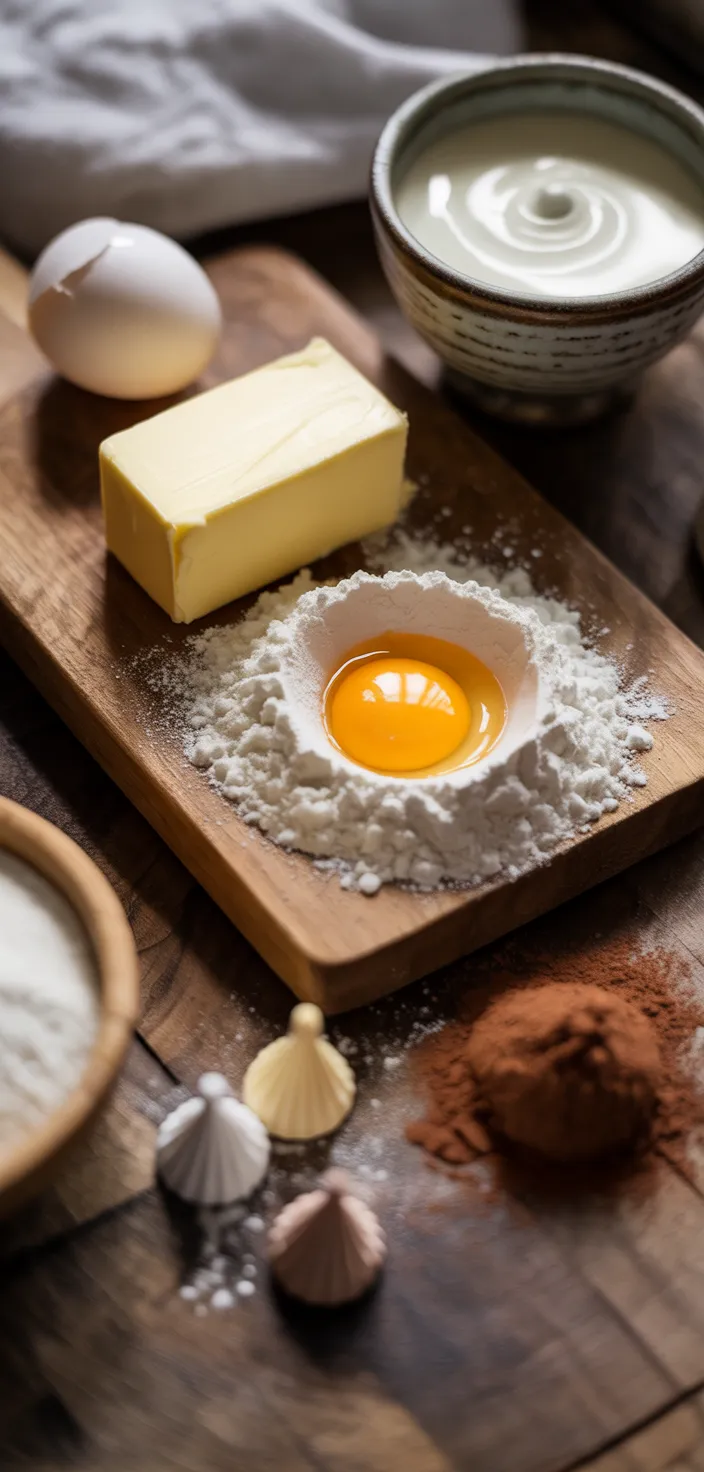
- Butter brings richness and soft chew; basically makes cookies tender.
- Granulated sugar adds sweetness and slight crunch; it’s classic cookie fuel.
- Egg binds everything together and gives lift; you’ll get a soft middle.
- Plus buttermilk keeps cookies moist and adds a tiny tang.
- Vanilla adds warm background flavor; it makes them taste homemade.
- Red gel gives bold color fast; you’ll get that festive red.
- Flour provides structure so cookies hold shape yet stay soft.
- Cocoa adds a faint chocolate note and deepens the red.
- Baking soda helps spread and rise; basically gives light texture.
- Salt balances sweetness and wakes up the chocolate hints.
- Powdered sugar gives a snowy coating and delicate sweet dusting.
- Hershey’s Kisses melt slightly at center, giving an iconic chocolate surprise.
Ingredient Quantities
- 1/2 cup (1 stick) unsalted butter, softened
- 3/4 cup granulated sugar
- 1 large egg, room temperature
- 2 tablespoons buttermilk or sour cream
- 1 teaspoon vanilla extract
- 1 tablespoon red gel food coloring (or 2 teaspoons liquid red)
- 1 1/4 cups all purpose flour, lightly packed
- 2 tablespoons unsweetened cocoa powder
- 1 teaspoon baking soda
- 1/2 teaspoon fine salt
- About 1/2 to 3/4 cup powdered sugar for rolling
- 36 Hershey’s Kisses, unwrapped (or about one per cookie)
How to Make this
1. Preheat oven to 350 F and line two baking sheets with parchment paper or silicone mats, set aside.
2. In a large bowl beat 1/2 cup softened unsalted butter with 3/4 cup granulated sugar until light and fluffy, about 2 to 3 minutes; scrape down sides when needed.
3. Add 1 large room temperature egg, 2 tablespoons buttermilk or sour cream, 1 teaspoon vanilla extract, and 1 tablespoon red gel food coloring (or 2 teaspoons liquid red) and mix until fully combined; batter will be bright red.
4. In a separate bowl whisk together 1 1/4 cups lightly packed all purpose flour, 2 tablespoons unsweetened cocoa powder, 1 teaspoon baking soda, and 1/2 teaspoon fine salt.
5. Gradually add the dry ingredients to the wet mixture and stir until just combined; do not overmix or cookies get tough.
6. Scoop dough into rounded tablespoons or use a small cookie scoop, rolling each piece into a ball; you should get about 36 balls. Roll each ball in powdered sugar until coated, using about 1/2 to 3/4 cup total.
7. Place coated dough balls 2 inches apart on the prepared baking sheets. If dough is very soft chill the balls 10 to 15 minutes so they hold shape better.
8. Bake one sheet at a time in the center of the oven for 8 to 10 minutes, until cookies are set around the edges but still soft in the center. Do not overbake.
9. Remove sheet from oven and immediately press one unwrapped Hershey’s Kiss into the center of each cookie. The heat will soften the chocolate and create the blossom look. If the Kiss doesn’t stay, give cookies 10 to 20 seconds to cool on the sheet then press again.
10. Let cookies cool on the baking sheet a few minutes, then transfer to a wire rack to cool completely. Store in an airtight container at room temp up to 4 days, or freeze for longer. Enjoy.
Equipment Needed
1. Oven (preheated to 350 F)
2. Two baking sheets lined with parchment paper or silicone mats
3. Large mixing bowl and a smaller mixing bowl
4. Electric hand mixer or stand mixer (or a sturdy whisk if you dont have one)
5. Measuring cups and spoons
6. Rubber spatula or wooden spoon for scraping and stirring
7. Small cookie scoop or tablespoon and your hands for rolling dough balls
8. Shallow bowl for powdered sugar coating
9. Wire cooling rack and a flat spatula or cookie lifter
FAQ
Easy Hershey’s Red Velvet Blossoms Cookies Recipe Substitutions and Variations
- Butter: swap with equal parts solid coconut oil or stick margarine. Coconut oil gives a slight coconut taste, margarine keeps it neutral, but cookies may spread a bit more.
- Buttermilk or sour cream: stir 1 tablespoon white vinegar or lemon juice into 2 tablespoons milk and let sit 5 minutes, or use 2 tablespoons plain yogurt instead.
- Red gel food coloring: use 2 to 3 teaspoons liquid red food coloring if you don’t have gel, or 1/2 to 1 teaspoon beet powder for a natural color (color may be less vivid).
- Hershey’s Kisses: press a chocolate kiss replacement like a large chocolate chip or a mini peanut butter cup into each cookie after baking, or drop an unwrapped truffle if you want something fancier.
Pro Tips
1. Chill the dough if it’s too soft. If your balls flatten out on the sheet chill them 10 to 15 minutes or even 30 if your kitchen is warm. Cold dough keeps the cookies thicker and lets the powdered sugar look more snowball-y.
2. Measure flour the right way. Spoon it into the cup then level it off, dont pack it down. Too much flour = dry, cakey cookies. If you want extra fudgy texture cut the flour by 1 to 2 tablespoons.
3. Roll in powdered sugar twice for a prettier crackle. Do one light roll before chilling and another right before baking. The first layer sticks better, the second gives that bright white contrast after baking.
4. Put the kisses in at the right moment. Press them in right after you pull the sheet from the oven while the cookies are still warm but not piping hot. If they slide out, wait 10 to 20 seconds then press again. For cleaner tops, briefly microwave the kisses 3 to 5 seconds in a row to soften them a little before pressing.
Easy Hershey's Red Velvet Blossoms Cookies Recipe
I just made Red Velvet Thumbprint Cookies that are insanely red with a shiny Hershey Kiss in the middle and yes, they look exactly like edible jewelry.
36
servings
90
kcal
Equipment: 1. Oven (preheated to 350 F)
2. Two baking sheets lined with parchment paper or silicone mats
3. Large mixing bowl and a smaller mixing bowl
4. Electric hand mixer or stand mixer (or a sturdy whisk if you dont have one)
5. Measuring cups and spoons
6. Rubber spatula or wooden spoon for scraping and stirring
7. Small cookie scoop or tablespoon and your hands for rolling dough balls
8. Shallow bowl for powdered sugar coating
9. Wire cooling rack and a flat spatula or cookie lifter
Ingredients
1/2 cup (1 stick) unsalted butter, softened
3/4 cup granulated sugar
1 large egg, room temperature
2 tablespoons buttermilk or sour cream
1 teaspoon vanilla extract
1 tablespoon red gel food coloring (or 2 teaspoons liquid red)
1 1/4 cups all purpose flour, lightly packed
2 tablespoons unsweetened cocoa powder
1 teaspoon baking soda
1/2 teaspoon fine salt
About 1/2 to 3/4 cup powdered sugar for rolling
36 Hershey's Kisses, unwrapped (or about one per cookie)
Directions
- Preheat oven to 350 F and line two baking sheets with parchment paper or silicone mats, set aside.
- In a large bowl beat 1/2 cup softened unsalted butter with 3/4 cup granulated sugar until light and fluffy, about 2 to 3 minutes; scrape down sides when needed.
- Add 1 large room temperature egg, 2 tablespoons buttermilk or sour cream, 1 teaspoon vanilla extract, and 1 tablespoon red gel food coloring (or 2 teaspoons liquid red) and mix until fully combined; batter will be bright red.
- In a separate bowl whisk together 1 1/4 cups lightly packed all purpose flour, 2 tablespoons unsweetened cocoa powder, 1 teaspoon baking soda, and 1/2 teaspoon fine salt.
- Gradually add the dry ingredients to the wet mixture and stir until just combined; do not overmix or cookies get tough.
- Scoop dough into rounded tablespoons or use a small cookie scoop, rolling each piece into a ball; you should get about 36 balls. Roll each ball in powdered sugar until coated, using about 1/2 to 3/4 cup total.
- Place coated dough balls 2 inches apart on the prepared baking sheets. If dough is very soft chill the balls 10 to 15 minutes so they hold shape better.
- Bake one sheet at a time in the center of the oven for 8 to 10 minutes, until cookies are set around the edges but still soft in the center. Do not overbake.
- Remove sheet from oven and immediately press one unwrapped Hershey's Kiss into the center of each cookie. The heat will soften the chocolate and create the blossom look. If the Kiss doesn't stay, give cookies 10 to 20 seconds to cool on the sheet then press again.
- Let cookies cool on the baking sheet a few minutes, then transfer to a wire rack to cool completely. Store in an airtight container at room temp up to 4 days, or freeze for longer. Enjoy.
Notes
- Below you’ll find my best estimate of this recipe’s nutrition facts. Treat the numbers as a guide rather than a rule—great food should nourish both body and spirit. Figures are approximate, and the website owner assumes no liability for any inaccuracies in this recipe.
Nutrition Facts
- Serving Size: 21g
- Total number of serves: 36
- Calories: 90kcal
- Fat: 4.2g
- Saturated Fat: 2.6g
- Trans Fat: 0.04g
- Polyunsaturated: 0.19g
- Monounsaturated: 1g
- Cholesterol: 14mg
- Sodium: 39mg
- Potassium: 16mg
- Carbohydrates: 12.2g
- Fiber: 0.46g
- Sugar: 8.7g
- Protein: 0.86g
- Vitamin A: 31IU
- Vitamin C: 0mg
- Calcium: 11mg
- Iron: 0.21mg